Monday, June 8, 2009
Studio and Camera Setups
Rimu-chan moments =3
Well, I've already posted a guide on mini-studio setups in my main lair, which is my multiply site. But anyway, I hope this can be a more concrete guide. ^^ Well, I'll start off with the studio setup, basically you can setup a studio with two illustration boards, some desk lamps, some paper or the like for multiple backgrounds and of course a camera. Basically, my setup looks like this.
As you can see, those are what I use when I take photo shoots, two illustration boards, one for the surface and one to act as a wall. Clamped to it is a silver crepe paper to add some textured background for a figure, you also see two flexible desk lamps that I use, and on the side are two mini-tripods, I change from time to time since it depends on the angle and the size of the figure.
Basically, black is pretty much a jack of all trades, it can be a default background for almost any figure you plan to take pictures of. But it doesn't hurt to buy some cheap papers that can be used for backgrounds so you'll always have choices for your figures to make them stand out even more. As for me, I have quite a few but still lacking other usable colors:
With proper combination, it can look like this when fired up:
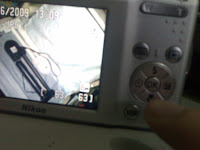
Now that the studio discussion is done, time to head for the camera, I'm not really familiar with cameras that much and I'm using a digital camera for my figures, but it's lovable enough for me. I'm using Nikon COOLPIX S210, a camera of my sister, hehe. Well, I'll be discussing how I set it up to produce those shots uploaded at my multiply. Hopefully, other digi-cams have the same functions so it can be of help to some. Anyway, sorry for the quality of the next few images since they were taken using a cellphone camera. Anyway, to start here's the camera I use.
Well, first few things about this camera is that the aperture is automatically adjusted by every zoom you make. Next, one of the major useful factors with taking pictures in this camera is to have the macro mode turned on. Macro mode option can be seen by pressing the flower like symbol beneath the ok button. On the side note, macro mode only works with the first two zoom options in this camera.
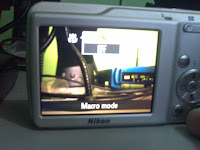
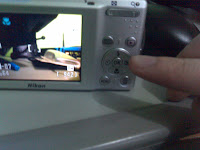
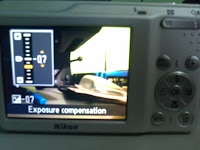
Another one if the exposure compensation, it controls the amount of light you take in, I'm pretty sure that it's not brightness since the camera has a separate menu for brightness. I usually leave it at -0.7 but occasionally shifts it the photo proves it's pretty dark. Exposure menu is accessed by pressing the +/- symbol next to the ok button.
Now to the major factors of the photo:
There's a menu button on the lower left, by pressing it you access the menu to change the ff. major factors: ISO, White Balance and Color Options, while there are still other options left, they do not affect the shot that much compared to the 3 I mentioned.
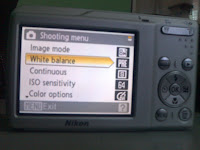
White Balance:
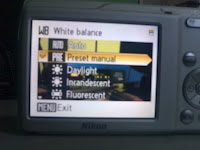
White balance from my experience is the most major factor in the photos that I shoot, it adjusts the colors depending on the surrounding, while there are pre-defined surrounding setups, I prefer to have it adjusted manually. This is done by selecting Preset Manual and usually the trick is point it to a well-lited black surface, then press ok, this should fix the colors properly now, but if you don't want to, you can always just select Fluorescent or Auto since they pretty much do well already.
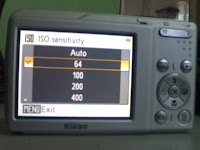
Basically ISO helps you if you're having blurry shots, although, you need to set the ISO to a higher value meaning, it'll produce a lot of noise in the picture, making it grainy. I best suggest the ISO to be set at the lowest possible setting to have very more crisp shots. Anyway, with a mini-studio in hand, you won't have much problems with brightness already. And if you have the help of tripods, better use the lowest ISO.
Color Options:
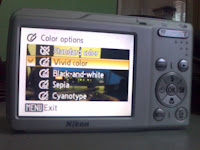
This is determines the basic color setup, I usually set it to vivid color since it produced more lively colors on the photo compared to standard, which basically sets it to the real colors you see on your subject. Depending on what you want to do, you can choose black and white, sepia, etc.
Well my setup is as follows:
Macro mode: on
Exposure Compensation: -0.7
ISO Sensitivity: 60
Color Option: Vivid
White Balance: Preset Manual
Macro mode: on
Exposure Compensation: -0.7
ISO Sensitivity: 60
Color Option: Vivid
White Balance: Preset Manual
Final advise would be if you don't know how to work around with your camera that much, play around with them and read the instruction manuals for help. ^^
With those and proper lighting and mini studio setup, you can produce photos like these:
Hope this helped in any way, well, what are waiting for bring out those moments with your collection. ^^
Subscribe to:
Post Comments (Atom)


No comments:
Post a Comment